There is a specific kind of shock that happens on a Tuesday morning in February. You step out of a steamy, relaxing shower, reach for your towel, and put your bare foot down onto the bathroom tile.
Ice.
It’s enough to ruin your morning zen instantly. For years, I thought heated floors were reserved for luxury hotels or multi-million dollar mansions. I assumed they were complicated, dangerous, and prohibitively expensive to install.
I was wrong.
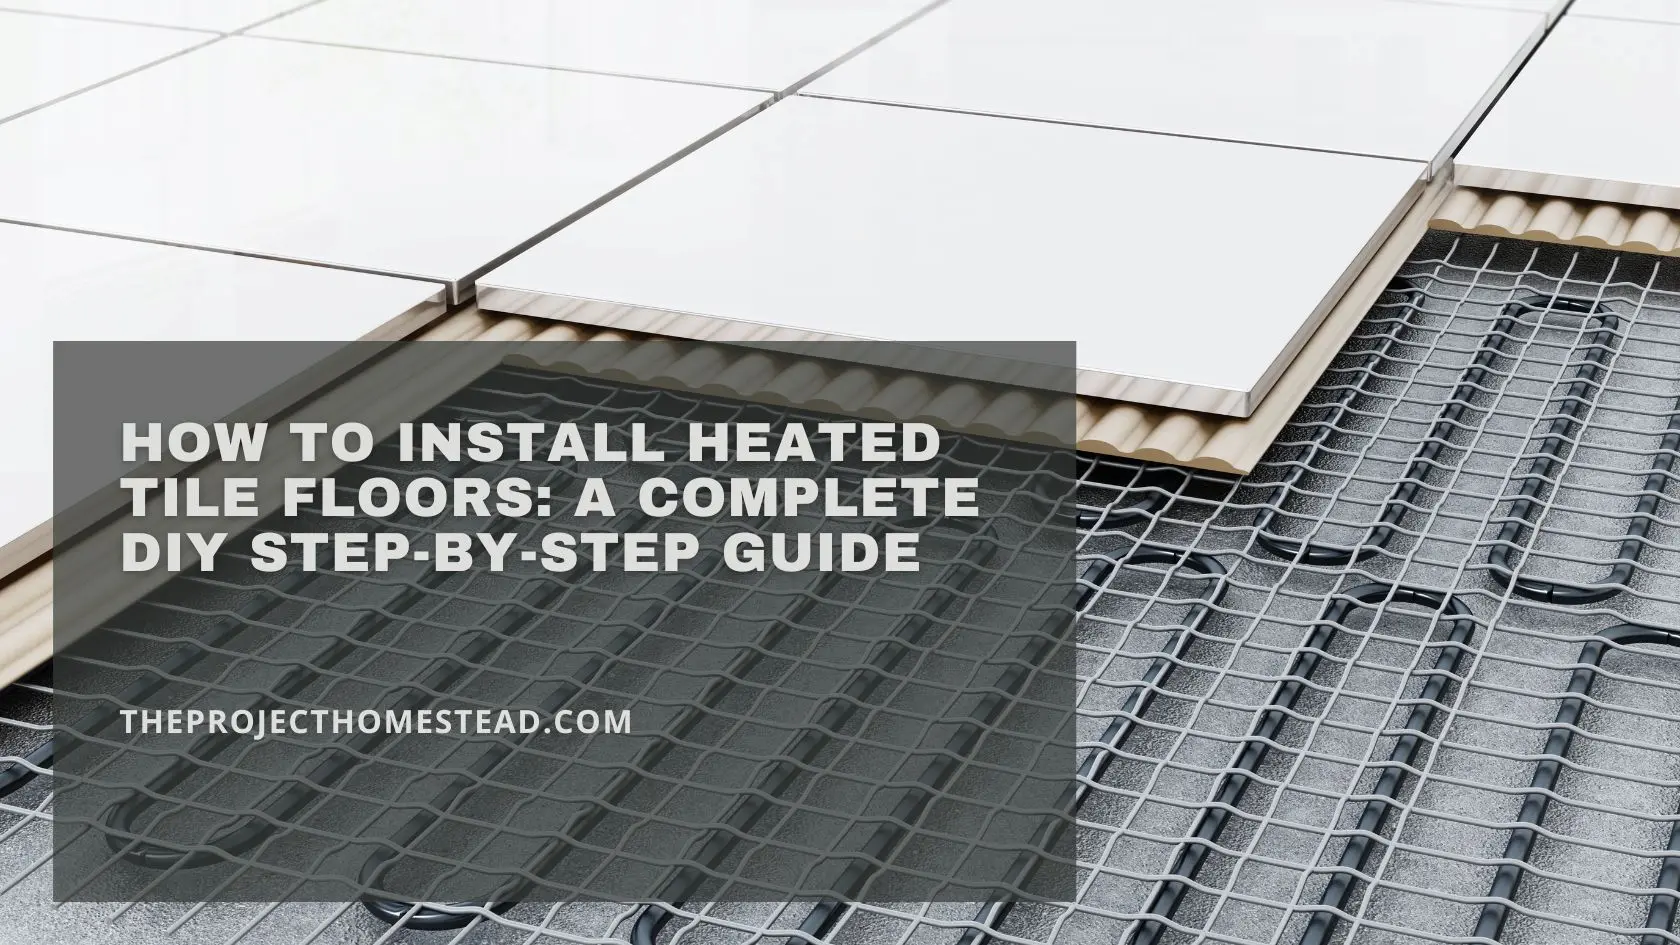
Adding electric radiant floor heating is actually one of the most accessible, high-impact DIY upgrades you can make during a bathroom remodel. It doesn’t require a boiler or complex plumbing. It’s essentially an electric blanket specifically designed to live under your tile.
However, unlike painting a wall, you can’t easily “fix” this project if you mess it up. Once the tile is down, there is no going back.
That’s why I wrote this guide. I’m going to walk you through how to install heated tile floors in a bathroom the right way. We will cover the planning, the scary electrical testing (it’s not that scary, I promise), and the installation techniques that ensure your toes stay toasty for decades.
Let’s heat things up.
Part 1: Understanding the System (Mats vs. Cable)
Before you buy anything, you need to know what you are installing. Electric floor heating generally comes in two flavors:
-
Heating Mats: The heating wire is pre-attached to a mesh fiberglass backing.
-
Pros: Very fast to roll out on large, square areas. The spacing is already done for you.
-
Cons: Tricky to fit around toilets, angled walls, or pedestal sinks.
-
-
Loose Cable (with Guides): You buy a spool of heating wire and plastic guides (or a membrane like Schluter-DITRA-HEAT). You snap the wire into the guides yourself.
-
Pros: Ultimate flexibility. You can heat every weird corner of your bathroom.
-
Cons: Takes a bit longer to install.
-
My Recommendation: For most DIYers, especially in small or oddly shaped bathrooms, the Loose Cable system with a Membrane (like DITRA-HEAT) is superior. It decouples the tile (preventing cracks), waterproofs the floor, and holds the wire perfectly. However, for this guide, I will cover the general principles that apply to both mats and cables, as the electrical rules are the same.
Part 2: The Golden Rules of Heated Floors
If you take nothing else from this article, memorize these three rules. They will save you from a disaster.
Rule #1: NEVER Cut the Heating Wire
You can cut the mesh matting. You can cut the plastic guides. But you can never, ever cut the actual heating cable. If you buy a cable that is too long, you cannot trim it. You have to run it up the wall or bury it in a closet (which is bad). Buy the right size.
Rule #2: Do Not Heat Under Fixed Cabinets
Do not install heating wire under your vanity, toilet, or bathtub. The heat gets trapped and can ruin the wax ring on your toilet or dry out your vanity wood. Only heat the “walkable” areas.
Rule #3: Test, Test, and Test Again
You will test the wire with a multimeter three times:
-
When you take it out of the box.
-
After you install it (before tiling).
-
After you tile (before turning it on). This ensures you didn’t nick the wire during the process.
Part 3: Tools and Materials
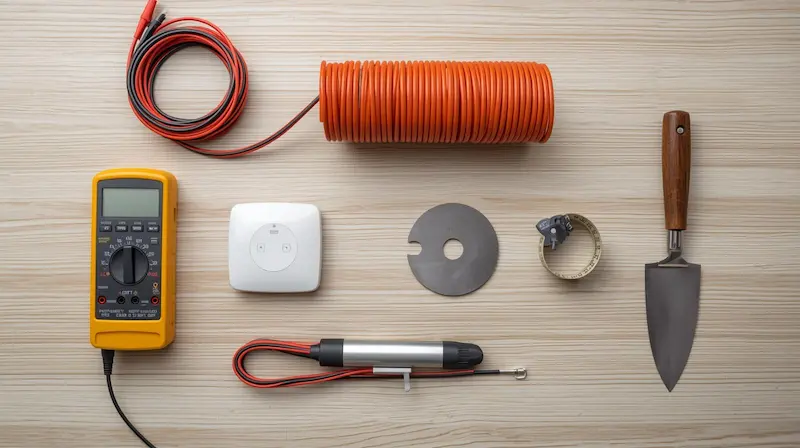
Here is your shopping list for a standard 50-square-foot bathroom.
The Heating System
-
Heating Cable or Mat: Sized for your walkable square footage (Total Area minus Vanity/Toilet/Tub).
-
Thermostat: Specifically designed for the brand of heat you bought.
-
Floor Sensor: Usually comes with the thermostat (Buy a second “backup” sensor—trust me).
Tools
-
Digital Multimeter: Essential for testing Ohms (resistance).
-
“Loudmouth” Monitor: A little device that screams if you cut the wire during installation. Best $20 insurance you can buy.
-
Hot Glue Gun: Helpful for securing loose wires or sensors.
-
Plastic Trowel: Metal trowels can nick wires. Plastic is safer for the embedment step.
-
Notched Trowel: For the thinset.
-
Electrical Tape.
Materials
-
Modified Thinset Mortar: Check your heating cable manual. Most require modified thinset for flexibility.
-
Self-Leveling Underlayment (Optional but Recommended): To bury the wires completely before tiling.
Part 4: Step-by-Step Installation
Step 1: The Electrical Prep (Do This First)
Floor heating usually requires a significant amount of power.
-
Small bathrooms (< 50 sq ft): Might be able to share an existing circuit, but check the amps.
-
Large bathrooms: Almost always need a dedicated 20-amp circuit run from your breaker panel.
Safety Note: If you aren’t comfortable running a new line from your breaker box, hire an electrician for this one hour of work. You can do the rest, but get the power source right.
Step 2: Prepare the Subfloor
Your subfloor must be clean, flat, and rigid.
-
Clean: Vacuum every speck of dust.
-
Prime: If using a self-leveler later, use the recommended primer on the plywood or concrete.
-
Cement Board: If you aren’t using a membrane system (like DITRA), install cement backer board now.
Step 3: The Dry Layout (The Puzzle Phase)
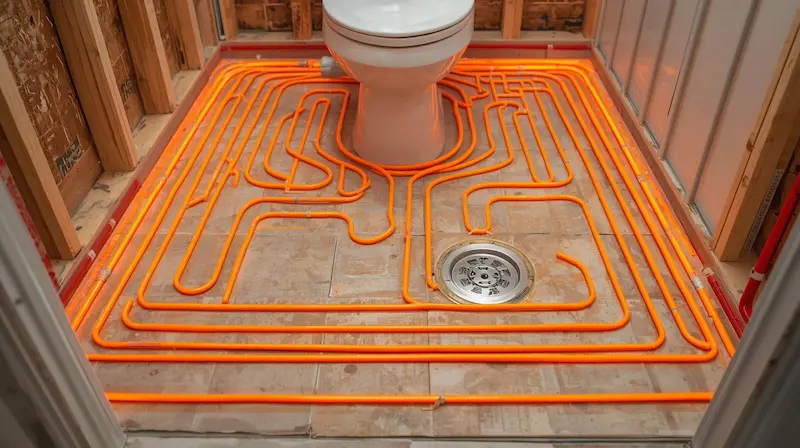
This is where you ensure you didn’t buy too much wire.
-
Mark your vanity, toilet, and tub locations on the floor with a marker or painter’s tape. Stay 3-4 inches away from the wax ring of the toilet.
-
Do a “dry run.” Lay out your mat or run your cable guides.
-
Ensure the “Cold Lead” (the thick black power cord attached to the heating wire) can reach the wall where your thermostat box is located.
Step 4: Install the Heating Wire
Once your layout is confirmed, secure it.
-
If using Mats: Thinset the mat down to the subfloor, or use double-sided tape/staples (carefully!) depending on the manufacturer’s instructions.
-
If using Cable/Membrane: Snap the cable into the plastic grooves. Keep the spacing uniform (usually 3 pegs or 3 inches apart).
Crucial Tip: Never let the heating wires touch or cross over each other. They will overheat and burn out (short circuit) at that spot.
Step 5: Install the Sensors (Yes, Plural)
The floor sensor is a small probe that tells the thermostat how hot the floor is.
-
Run the sensor wire from the thermostat box down to the floor.
-
Place the sensor tip exactly halfway between two heating wires. Do not place it directly on top of a heating wire (it will read false-hot).
-
Claire’s Pro Tip: Install a second backup sensor right next to the first one, but leave the wires disconnected in the wall box. Sensors fail. Wires don’t. If your sensor dies in 5 years, you can’t rip up the tile to change it. With a backup, you just swap the wires behind the thermostat wall plate. You’re welcome.
Step 6: The Resistance Test
Now, get your Multimeter.
-
Set it to Ohms (Ω).
-
Touch the probes to the two conducting wires of the heating cable.
-
The Reading: It should match the number on the tag on your heating cable (e.g., 55 Ohms). If it reads “OL” (Open Loop) or Infinity, the wire is cut. Stop immediately.
-
The Sound Test: Connect your “Loudmouth” monitor to the wires. Leave this on during the entire tiling process. If you accidentally nick a wire with your trowel, it will scream at you.
Step 7: Embedding the Wire
You have two choices here.
-
Method A: The “All-in-One” (Risky for beginners). You spread thinset over the wires and lay tile immediately. This is hard because your trowel can snag the wire, and it’s hard to get the tiles level.
-
Method B: The “Self-Leveler” (My Recommendation).
-
Mix up a bag of Self-Leveling Underlayment (SLU).
-
Pour it over the entire heating wire setup until the wires are just covered (about 1/4 inch thick).
-
Let it cure overnight.
-
Why this is better: It protects the wire 100%. You now have a perfectly flat, smooth surface to tile on tomorrow without worrying about cutting the wire.
-
Step 8: Tiling and Grouting
Once your embedment layer is dry:
-
Tile as normal. Use a polymer-modified thinset.
-
Be gentle. Even though the wire is covered, don’t drop heavy boxes of tile on the floor.
-
Grout the floor.
-
Wait: Do not turn the heat on yet! You must wait for the thinset and grout to fully cure (usually 28 days). If you turn the heat on too soon, the moisture in the thinset will evaporate too fast, making the bond brittle and cracking your tiles.
Step 9: Wiring the Thermostat
Shut off the breaker.
-
Connect the Line (power from your house) to the Line terminals on the thermostat.
-
Connect the Load (power to the floor) to the Load terminals.
-
Connect the Sensor wires.
-
Mount the faceplate.
Turn the breaker back on. Set your temperature (80°F / 26°C is heaven).
Part 5: Frequently Asked Questions (FAQ)
Q: How much does it cost to run heated floors? A: Surprisingly little. For a standard small bathroom, it costs about the same as running three 60-watt lightbulbs. In most areas, that’s roughly $2 to $5 per month if you run it only in the mornings and evenings.
Q: Can I put heated floors in the shower? A: Yes! But you need a specific cable rated for “Wet Areas” and you must check local waterproofing codes. It’s an amazing upgrade, but slightly more technical.
Q: Is it safe? Can I get electrocuted? A: It is very safe. The heating wires are fully insulated and shielded, grounded, and GFCI protected (at the thermostat). As long as it is installed correctly without cuts, there is zero risk of shock.
Q: Can I cut the wire if it’s too long? A: NO. I will say it again: NO. If you cut the heating element, the resistance changes, it will overheat, and it can cause a fire. It also voids the warranty instantly. If the wire is too long, re-do your layout to use up the slack (without crossing wires) or run it into a closet.
Final Thoughts: Is It Worth It?
Installing heated floors adds about $300 – $600 to the cost of a bathroom remodel and one extra day of labor.
But let me tell you: The first time you walk into your bathroom at 6:00 AM in the dead of winter and your feet are greeted by warmth radiating up through the stone… you won’t think about the $300. You’ll think it’s the best money you ever spent.
It changes the bathroom from a “utility” room into a “sanctuary.”
Take your time, test your wires, and stay warm!