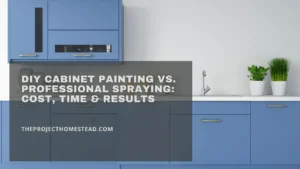
You have spent weeks scrubbing, sanding, and perfecting your cabinets using our [Guide to DIY Cabinet Painting]. The cupboards look fresh, modern, and beautiful.
But now, you step back and notice the problem. That crisp new paint job makes your old, yellowing laminate backsplash (or worse, the bare drywall) look absolutely terrible.
You want a tile backsplash. But you don’t have a wet saw. You don’t know how to mix thinset mortar. And you definitely don’t want to spend $1,500 on a tiler right now.
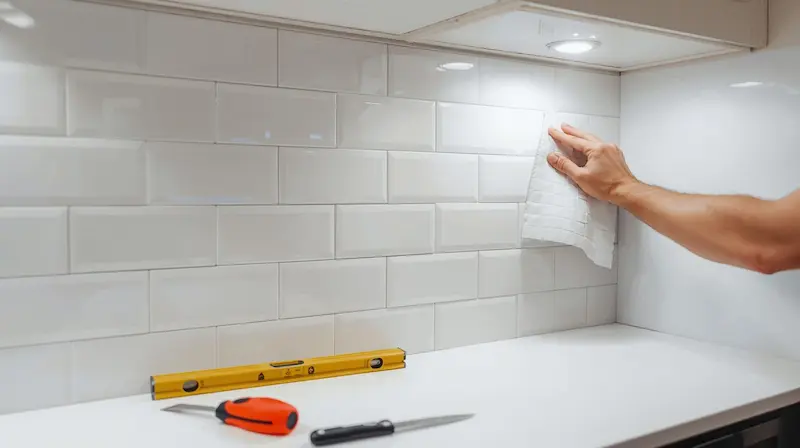
Enter the internet’s favorite quick-fix: Peel and Stick Backsplash.
It sounds like the perfect solution. It’s cheap, it requires zero power tools, and you can finish it in an afternoon. But a nagging question remains in the back of your mind: “Will this look like a cheap sticker? Is it going to look tacky?”
Five years ago, the answer was probably yes. But in 2026, the technology has changed.
In this guide, we are going to be brutally honest about self-adhesive tiles. We will look at the different materials available, the pros and cons you need to know, and the specific brands that actually pass the “eye test.”
The Verdict: Is It Tacky?
Let’s rip the bandage off. Is it tacky?
It depends entirely on what you buy.
-
The “Puffy Sticker” Era is Over: Avoid the cheap, 3D “puffy” vinyl tiles that feel like a gel sticker. Yes, those look fake. They reflect light poorly and scream “temporary solution.”
-
The New Tech: Today, you can buy peel-and-stick tiles made of real glass, real stone, and real metal. Even the high-end vinyl options now use rigid composite cores that mimic the hardness and shine of ceramic.
If you choose the right material and install it with precision, most guests will walk right into your kitchen and assume you hired a pro to lay subway tile.
Pros and Cons: What You Need to Know
Before you order 50 sheets from Amazon, weigh these factors.
The Pros
-
DIY Friendly: If you can use scissors and a utility knife, you can do this. No wet saw, no dust, no grout mess.
-
Cost: A traditional tile job costs $20-$50 per square foot (installed). Peel and stick costs $5-$15 per square foot.
-
Speed: You can backsplash an entire standard kitchen in 3-4 hours.
-
Renter Friendly: Many brands are designed to be removable with heat (hairdryer), making them the #1 upgrade for apartments.
The Cons
-
The Heat Issue: This is the big one. Most vinyl adhesives will fail if they get too hot. You cannot install standard peel-and-stick tiles directly behind a slide-in gas range without a backguard. You need a “stove zone” rated tile (usually glass or metal).
-
Wall Prep is Unforgiving: If your wall has grease on it, the tiles will fall off in a month.
-
Longevity: Even the best ones are a 3-5 year solution. They are not a “forever” renovation like real ceramic.
Material Matters: Vinyl vs. Gel vs. Rigid
Not all sticky tiles are created equal.
1. Vinyl / Gel Sheets (Budget)
-
What is it? Flexible sheets that feel like stickers.
-
Best for: Laundry rooms, campers/RVs, or very tight budgets.
-
Reality Check: They look okay from a distance, but up close, they lack the depth of real grout.
2. Stone/Glass Composite (Premium)
-
What is it? Actual thin slices of stone or glass with a heavy-duty adhesive backing.
-
Best for: Main kitchens where you want to fool the eye.
-
Reality Check: They are harder to cut (you might need tin snips or a hacksaw), but they look 100% real because… they are.
Best Brands for 2026
I have tested a lot of samples. Here are the three that stand out.
1. Smart Tiles (The Reliable Standard)
-
Type: High-quality Vinyl.
-
Why I like them: They patented the “Gel-O” technology that mimics the curve of real grout lines. They adhere aggressively and are heat resistant enough for most cooktops (with a control panel). They have massive pattern variety.
2. Tic Tac Tiles (The Budget Pick)
-
Type: Thinner Vinyl.
-
Why I like them: The price point is unbeatable. Great for a quick refresh or a rental where you don’t want to invest much.
3. Aspect (The High-End Pick)
-
Type: Real Metal, Glass, and Stone.
-
Why I like them: If you want a metal backsplash or a real slate look, this is it. It doesn’t look like a sticker because it’s solid material.
Installation Tips for a Pro Finish
The difference between “Tacky” and “Wow” is usually the installation.
Step 1: The Degreaser Scrub (Do Not Skip)
Your kitchen walls are covered in invisible cooking grease. If you stick tiles to grease, they will peel.
-
Wash the wall with TSP (Trisodium Phosphate) or a heavy-duty degreaser like Krud Kutter.
-
Let it dry completely.
Step 2: Level the First Sheet
Gravity is your enemy. Do not trust your countertop or cabinets to be level.
-
Draw a level pencil line across the wall.
-
Align your first sheet to that line, not the counter.
Step 3: Overlap the “Grout”
Most vinyl sheets have a “grout line” edge. You are supposed to overlap the edges of the sheets so the grout lines merge perfectly. Do not butt them up side-by-side, or you will see a seam.
Step 4: Caulk the Edges
This is the secret sauce.
-
Once the tiles are up, run a bead of white silicone caulk along the bottom (where the tile meets the counter) and the corners.
-
This seals the edges and hides the fact that it’s a sticker. It creates that finished, built-in look.
Conclusion: A Worthy Upgrade?
Is peel and stick backsplash a permanent, 20-year solution? No. Is it a fantastic way to transform a kitchen for under $150 while you save up for a full renovation? Absolutely.
If you pair freshly painted cabinets with a clean, modern Smart Tile backsplash, you can completely change the vibe of your kitchen in a single weekend.
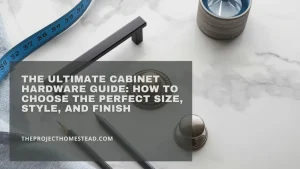
What’s next for your kitchen? Now that the walls and cabinets are looking fresh, don’t ignore the details. Those old, rusty knobs are going to stick out like a sore thumb. Check out my [Ultimate Cabinet Hardware Guide] to pick the perfect pulls to finish your renovation.
Happy sticking!